In this post, I talked about how I’ve reached Digital Scrapbooking Supply Nirvana, where I can see what I have, find what I need, and use it all when and how I want.
In this post, I shared my workflow and showed how I add new supplies to my library.
This is the post where it all pays off! Like I said before, it takes an investment of time and effort to set up an organization system – any system – but once it’s done, if you do the work to maintain it, it pays off in huge dividends by the time you save (and the frustration you avoid!) Here’s how I find what I need and use what I have.
Browsing my Kits in Lightroom
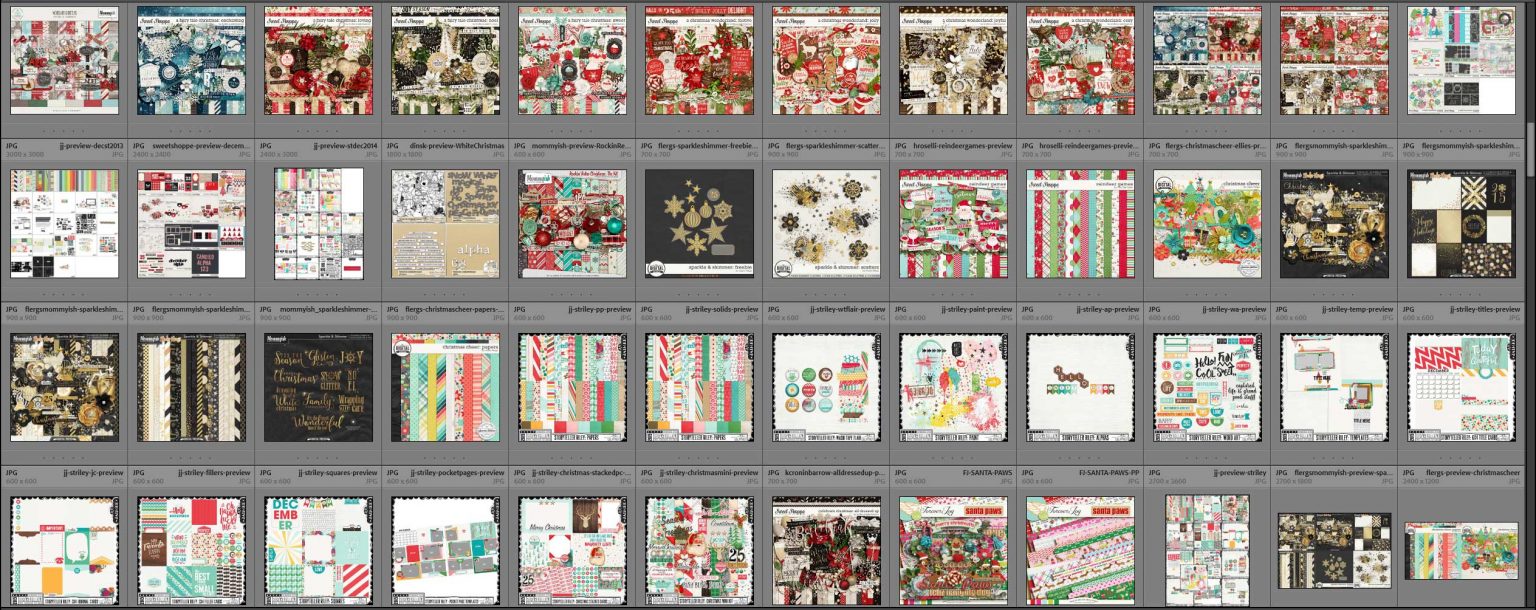
I have several Smart Collections set up in Lightroom, including one named INDEX Scrapbook Kits which gives me all the main preview images for every kit I own.

I always begin my supply hunt here. I can scroll through the thumbnails and wait to see what inspires me.
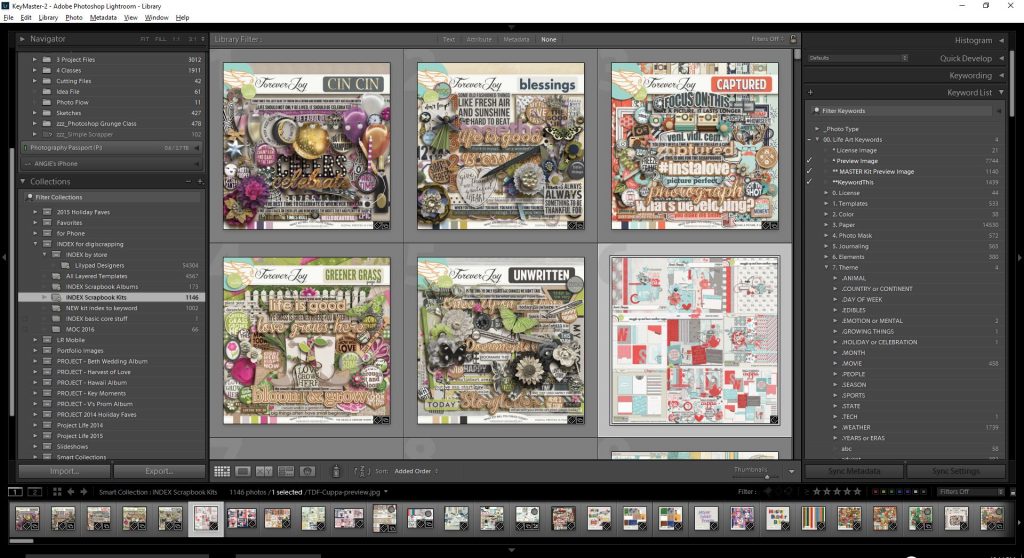
Or, I often have a particular theme or color scheme in mind when searching for a kit; if that’s the case, I use the FILTER bar at the top and select METADATA to refine it further by keyword.
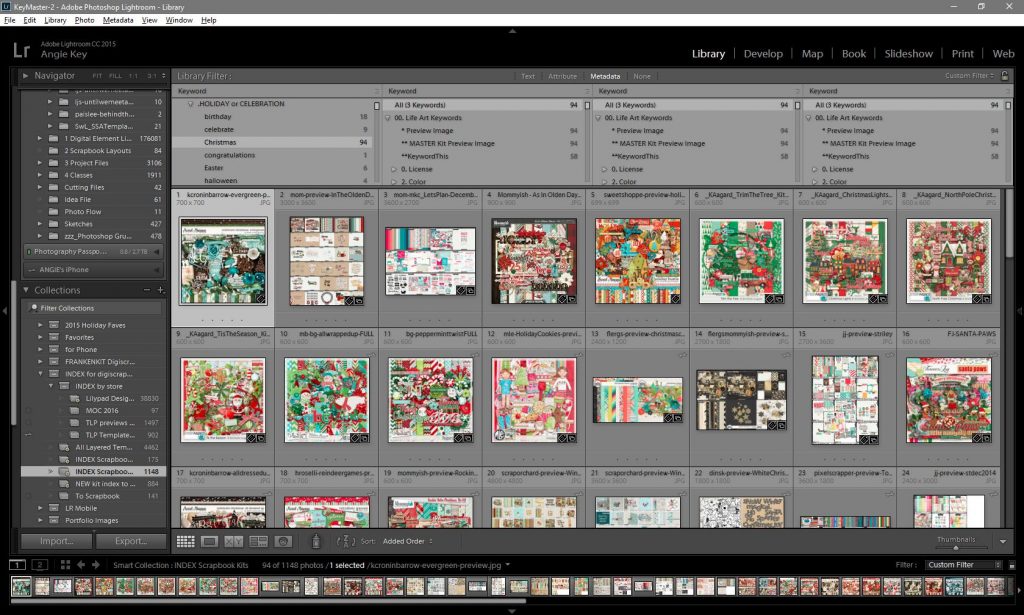
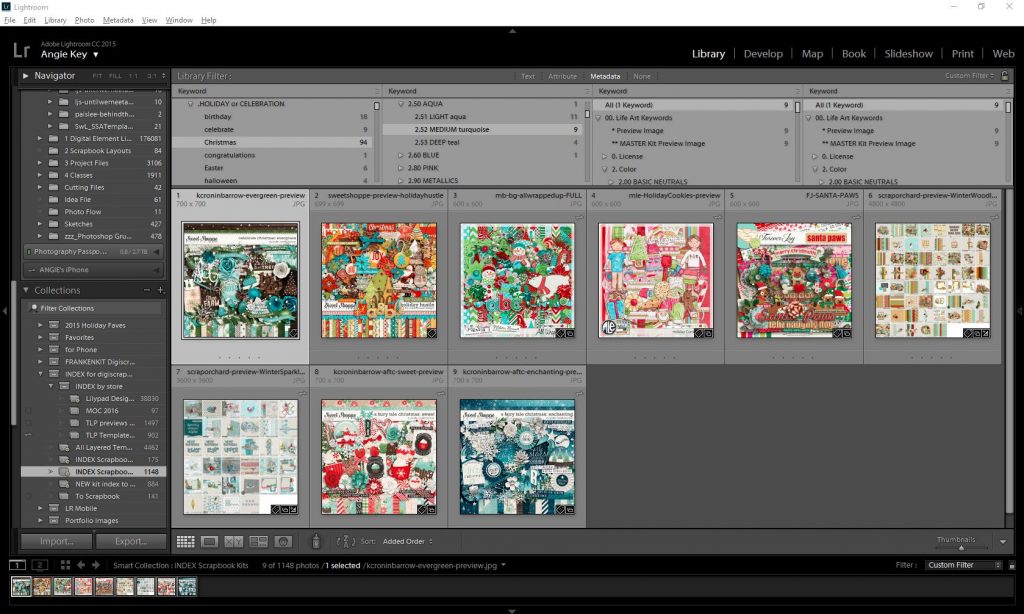
For example, if I’m looking for a kit about Christmas, in the first column I’d go to 7.Theme … .HOLIDAY or CELEBRATION … Christmas. That gives me 94 kits.
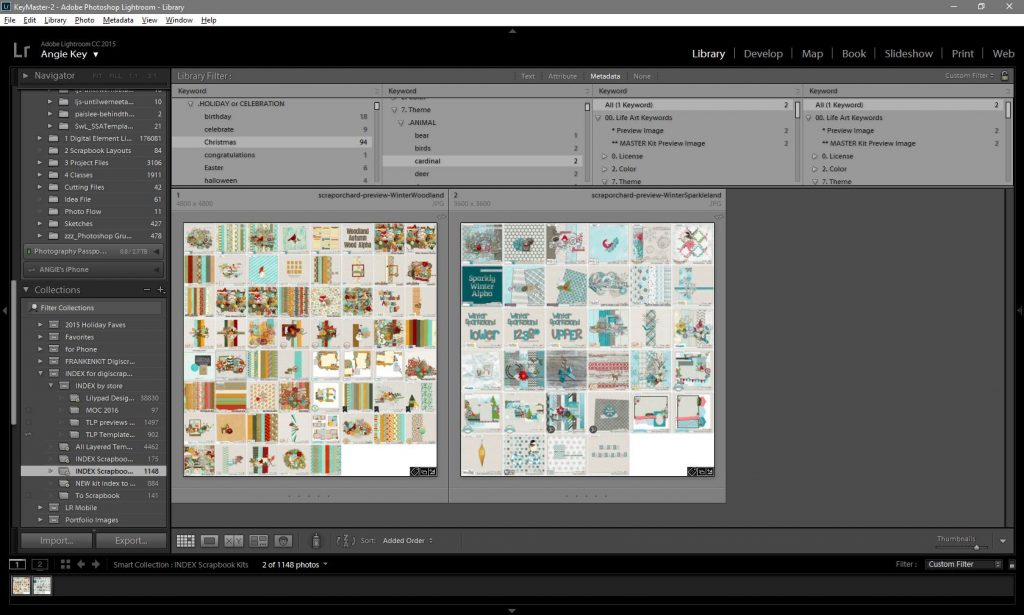
If I want to narrow it down and only see Christmas kits that have cardinals in them, in the second column I’d go to 7.Theme … .ANIMAL … cardinal. Looks like I have 2 kits that fit:
Or, if I’d rather narrow it down by color, in that second column I’ll go to 2.Color and choose 2.60 BLUE. I’ll get the 9 Christmas kits I own that I’ve tagged with any shade of blue:
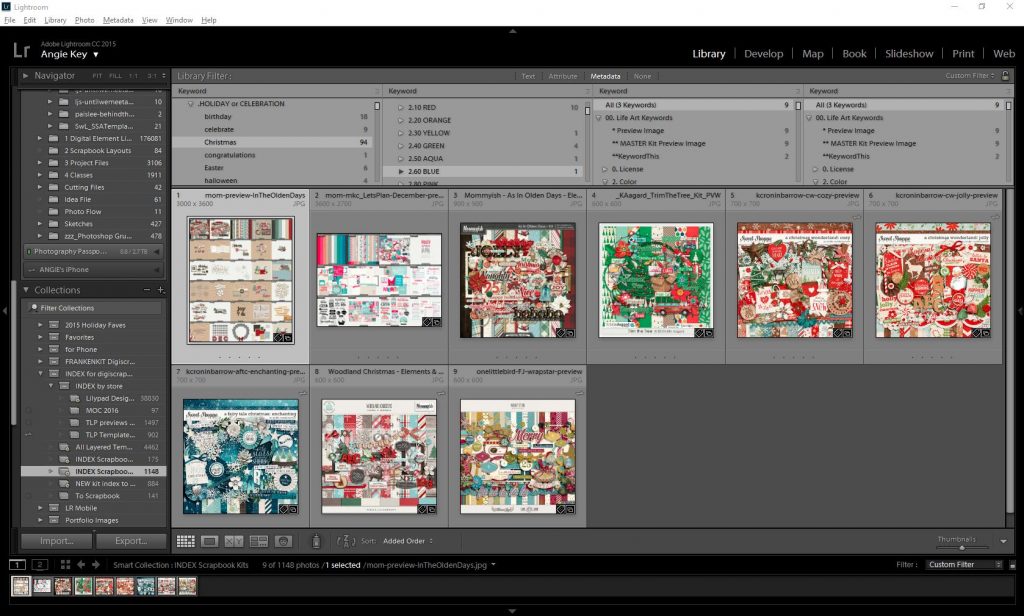
Or to get more specific, I can go to 2.Color … 2.50 AQUA … 2.52 MEDIUM turquoise to see the 9 Christmas kits I’ve tagged with turquoise:
Another example – if I have a set of photos of my nieces playing outside on a spring day, where the primary color is YELLOW I could set column #1 to 7.Theme … .SEASON … spring and column #2 to 2.Color … 2.30 YELLOW and I get these 10 kits:
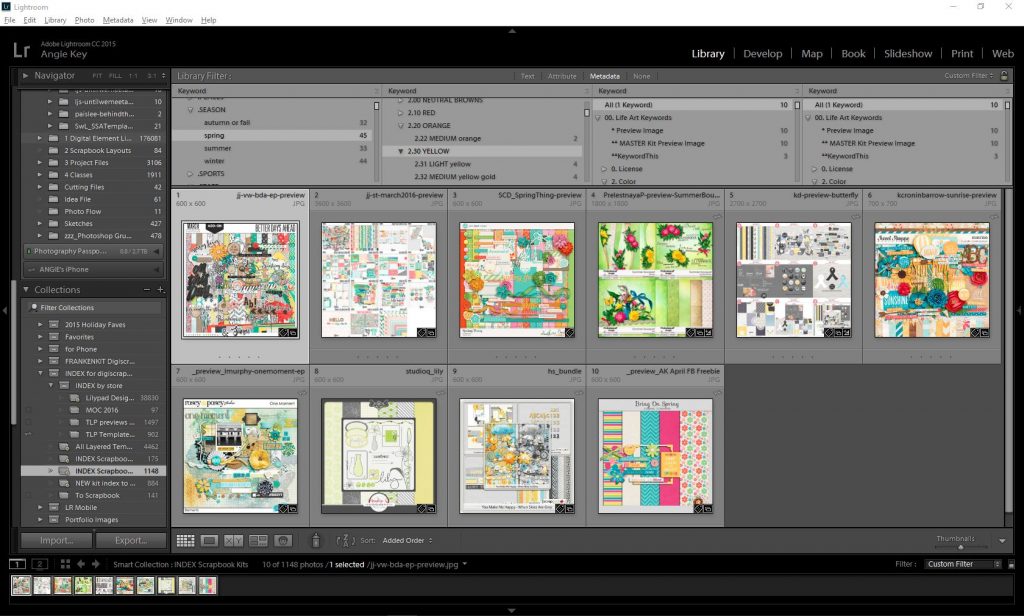
How detailed I go on my tagging depends solely on how detailed I want to get with my searching. I’ve found that since I’m only tagging previews, I can get fairly detailed but still be pretty quick. No, I’m not done tagging everything – as of today, I have 1148 scrapbook kits, and 884 of those left to finish keywording. But with just the 25% I’ve got completely keyworded, I’m finding SO MUCH utility! I can only imagine how much better it’ll be as I get the rest of them done.
Going from Kit Preview to Contents
Once I’ve decided which kit I want to use, going to the individual files is a piece of cake. I’ve discovered the fastest way to use my supplies is dragging and dropping from File Explorer to Photoshop. Why not Lightroom to Photoshop? Well, to get a file from LR to PS, you have to hit CTRL+E to edit, then tell it you want it to open the original file without Lightroom Adjustments, and then drag and drop in Photoshop from the file to the scrapbook canvas, and not only is that a pain, the new layer isn’t named with the original file name like it is if you drag and drop from File Explorer to place it on your canvas, so if you’re using a Supply Tracker script to keep track of what you use for posting in galleries … well, LR -> PS is NOT the way to do it.
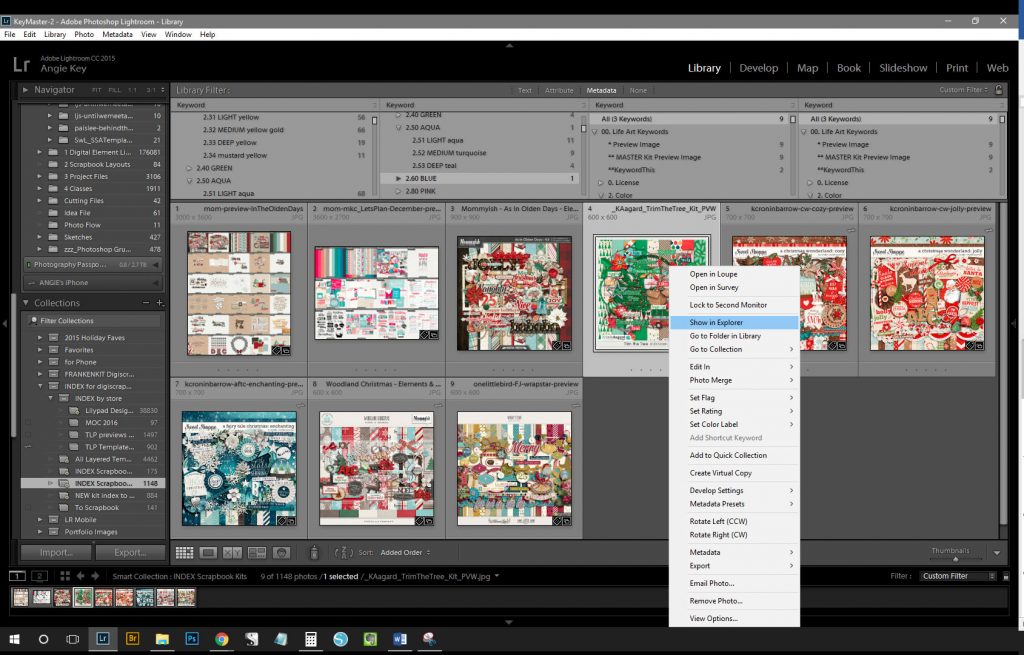
Say I want to use this kit by Kristin Aagard called Trim the Tree – I right-click the preview image and choose Show in Explorer.
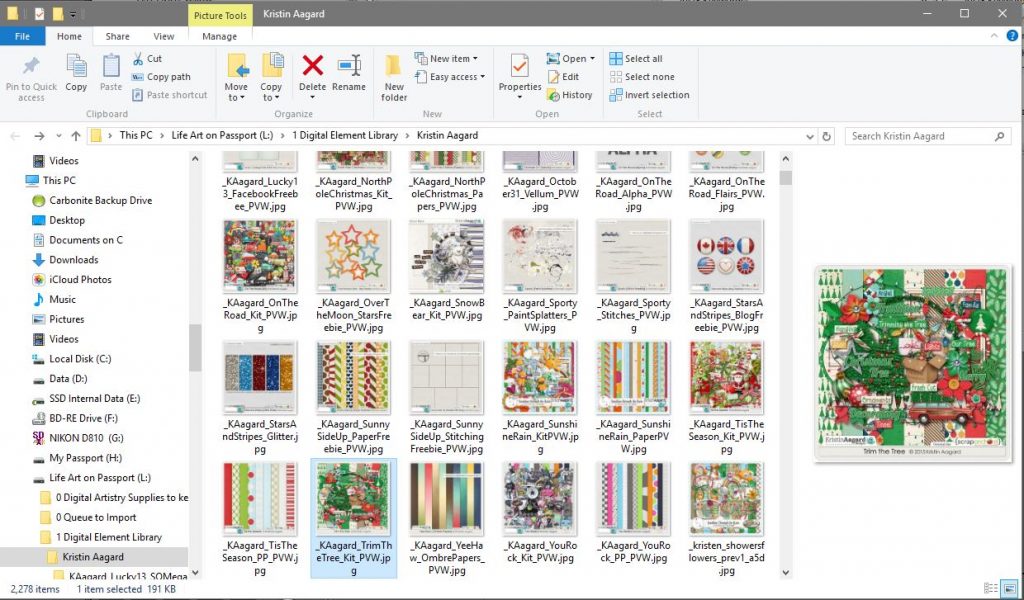
This opens the designer folder with the preview image selected.
Now this is where I get all sneaky with the “Search” tool in File Explorer. Designers are usually good about how they name their files, with their name and the kit name prefixing file details. So I just type in “trimthetree” in the search box, and now I see the 62 files in the kit. Bazinga!
NOTE: The Search box in File Explorer can search through not only the filename, but every searchable field, including the keywords. I could type in “kit – Trim the Tree” (surrounded by quotation marks) and get the same results.
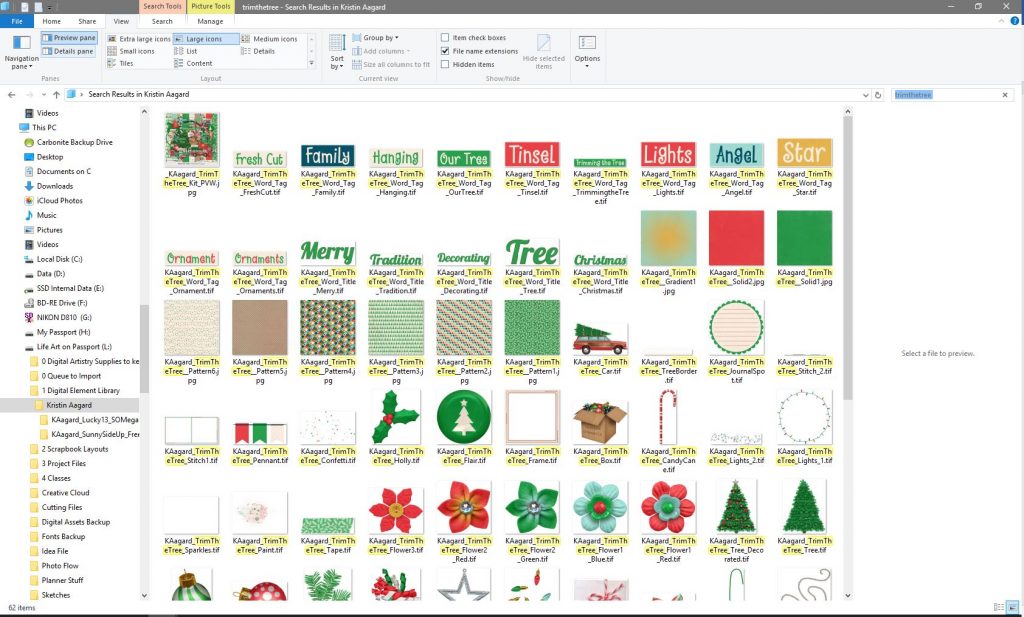
They’re all ready for me to drag-and-drop them into Photoshop as I create my layout.
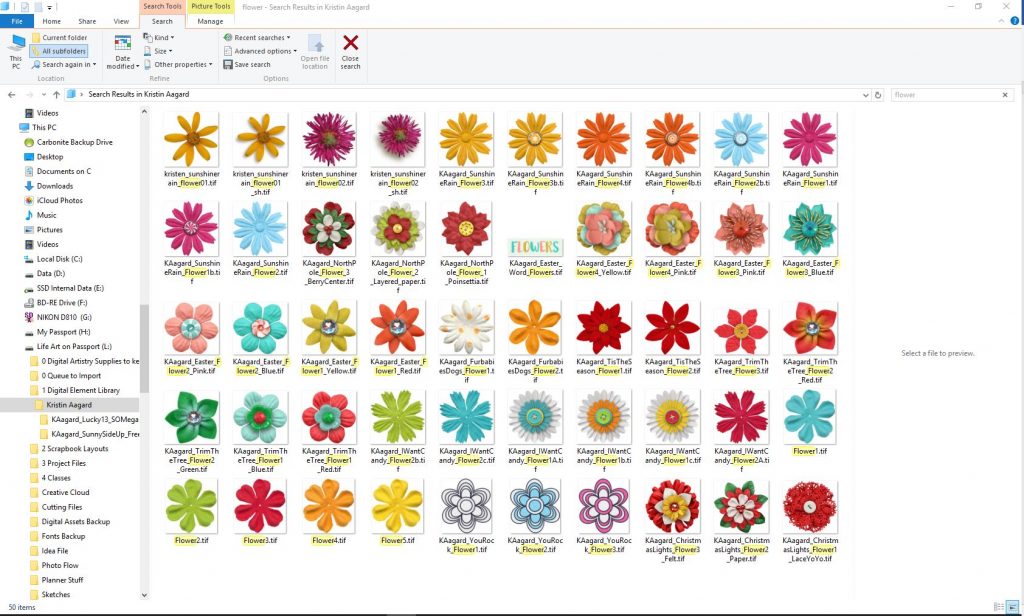
Now, say I’m working on this page and I want a flower in the same style, but I’m not finding one I like in this kit. Well, let’s see what this same designer included in another kit. I change the search to “flower” and now I see every file in my Kristin Aagard folder with “flower” in the file name, regardless of what kit it’s in.
Searching across all my kits in Lightroom
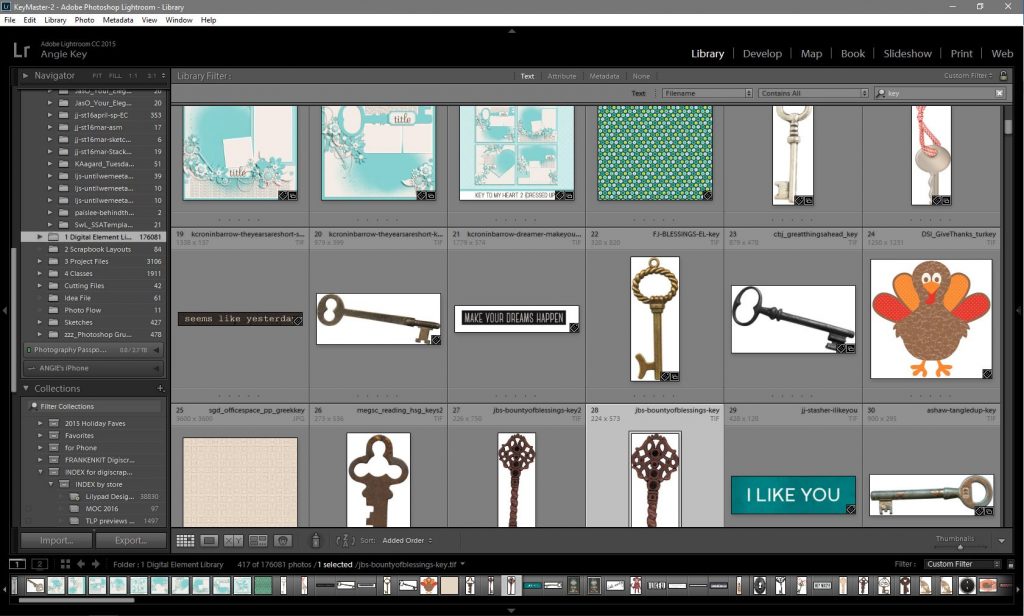
Let’s say I’m looking for a key – I’m obsessed with keys, thanks to my married last name – so I’ll go into Lightroom and select the folder 1 Digital Element Library. It pulls up the 176,081 files in my Lightroom database. (There’s actually 272,052 files inside that folder and its subfolders on my drive, but that’s why I removed all the alpha files from Lightroom – it moves so much faster without them.)
In the FILTER bar, I’ll choose Text, choose Filename, and then enter the word key. 417 files with the text “key” in the file name. It’s not perfect; it’ll pull up things like “turkey” and “monkey” but I can quickly scroll through 417 files and find what I want. Then I can either right-click and Show in Explorer or press CTRL+E to edit it in Photoshop.
My Favorite Trick in File Explorer
I love the Storyteller collection by Just Jaimee. They’re unendingly versatile! But there’s a lot of files in each bundle. For example, the March bundle has 2,353 files when you include the planner kit, collab kit, and all the delicious add-ons.
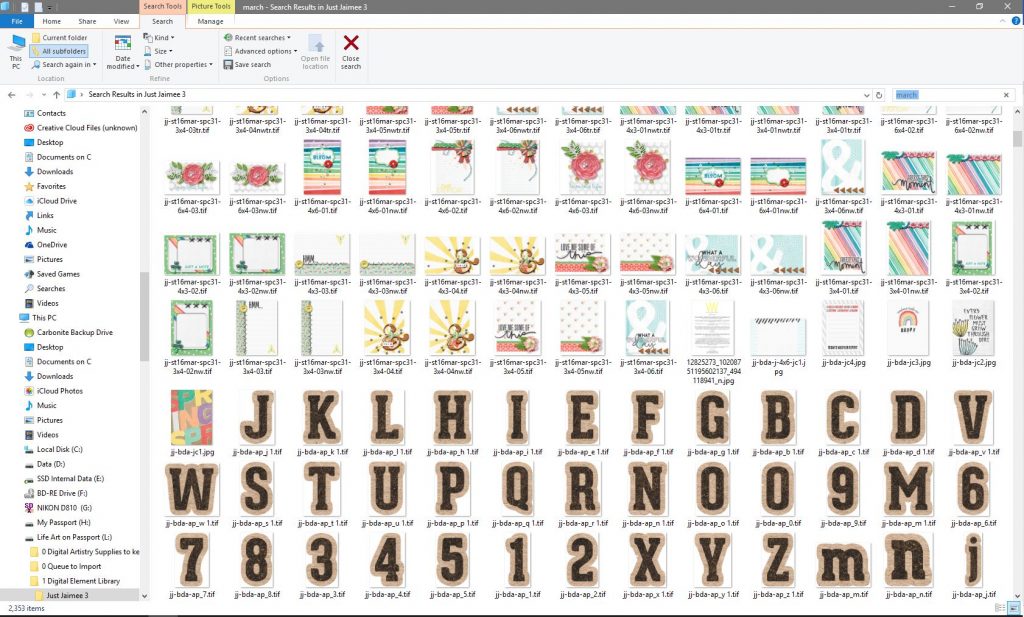
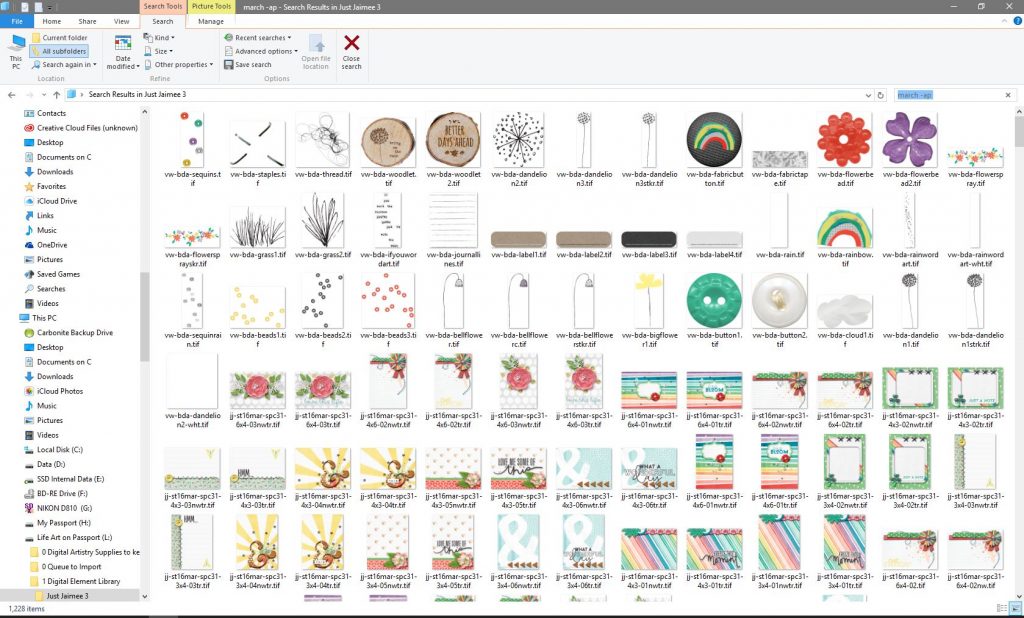
That’s a lot to scroll through as I’m scrapping a page. So here’s where I get really tricky – in the search box, I’ll tell it to hide all the alpha files (which Jaimee names with the letters “ap”) by adding to my search string. Right now, it has march in the box and shows everything tagged with march … I change it to march -ap to tell it to subtract the files with “ap” and now instead of 2,353 files, I get 1,228. How cool is that?!?
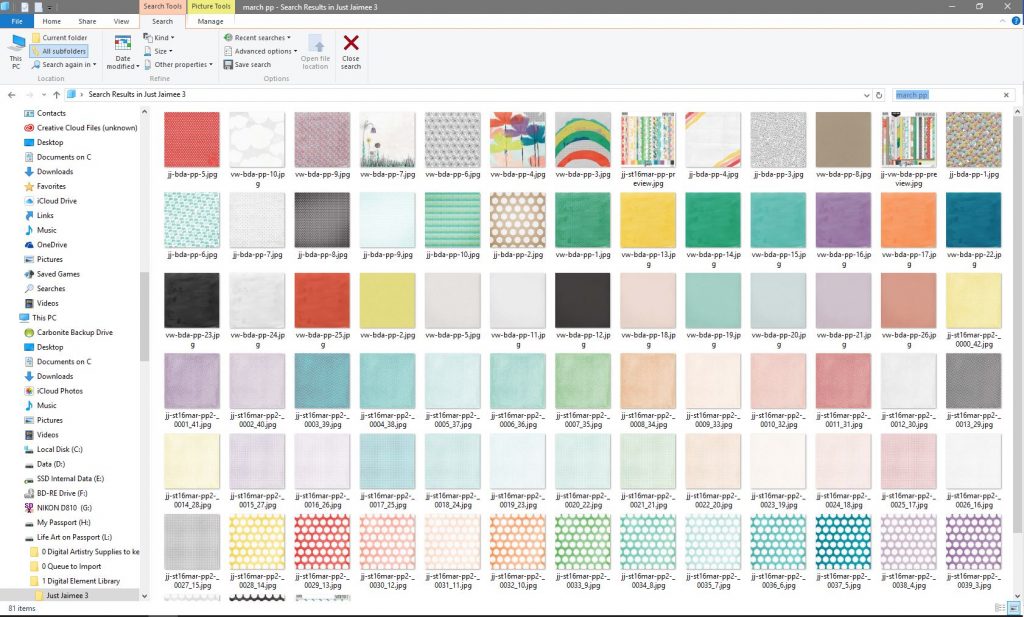
OR … only want to see the patterned paper files in the kit? Put in march pp and I get 81 files – all the “pp” files (patterned paper) in the “march” kit.
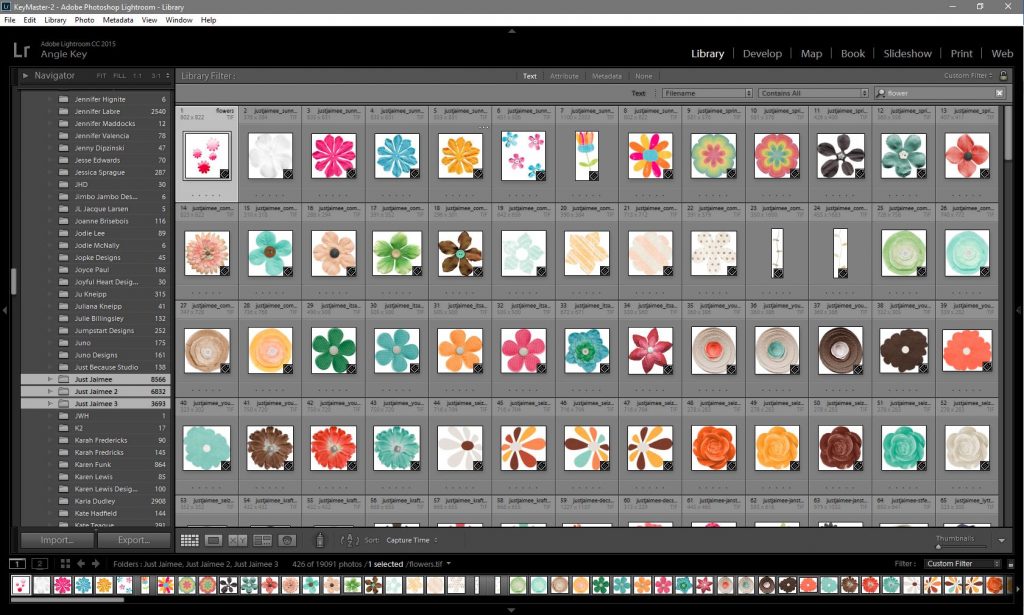
NOTE: I own so many of Just Jaimee’s products I’ve divided them into three folders, each with about 10,000 files (Just Jaimee, Just Jaimee 2, and Just Jaimee 3). If I wanted to search across all 3 folders for flowers, I’d SHIFT+CLICK in Lightroom to select all 3 folders and then use the filter bar to search, like so:
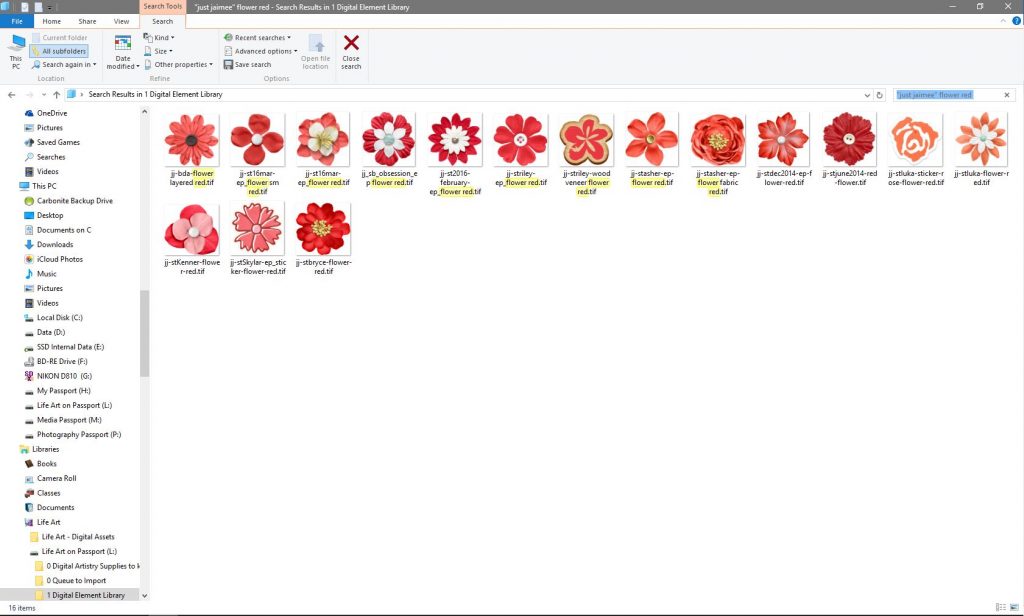
OR, go into File Explorer under my main L:\1 Digital Element Library folder, and in the search box type “just Jaimee” flower
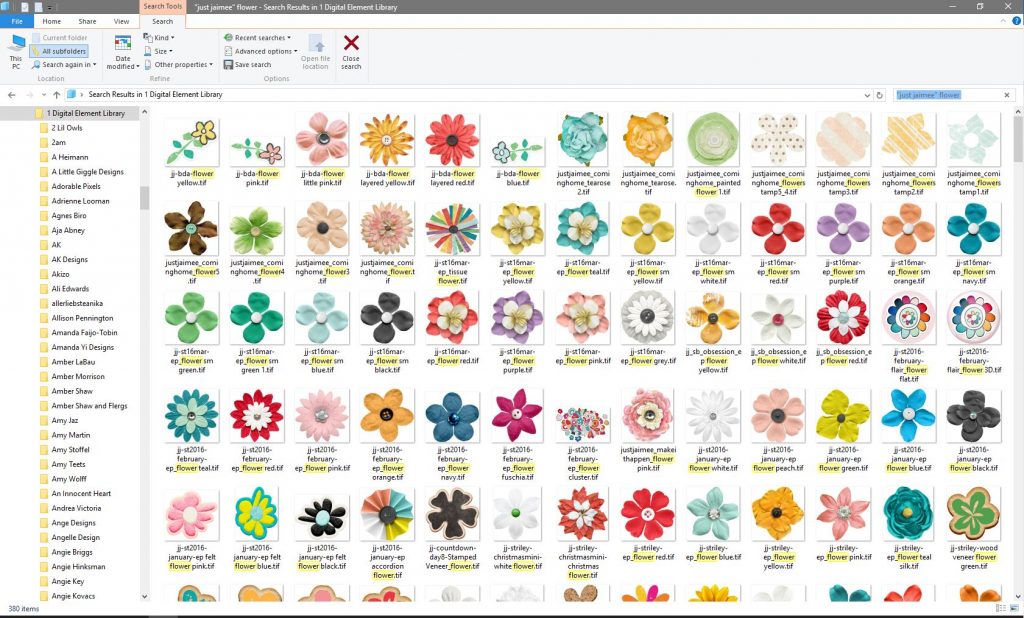
Getting fancy here – “just Jaimee” flower red gives me all the files that include the word “red” in the file name. Note that because I’m not color-tagging each individual file, if the flower is red but doesn’t have “red” in the name, it won’t appear here.
Browsing through Kits by Store
Over the last couple months, I’ve landed at The Lilypad and it’s quickly become my digiscrap home. So I can participate in challenges (which typically require a certain percentage of your supplies to come from designers at the store) I’ve set up smart collections for the designers that sell at The Lilypad.

At the end of last year, when Scrap Orchard closed, a bunch of their designers moved to The Lilypad. All I had to do was go in and edit the smart collection to include those designer names, and the collection automatically expanded to include their stuff.

For a couple weeks, I was scratching my head over why none of Fiddle-Dee-Dee’s templates were coming up in my Lilypad Designer’s collection. Turns out I had entered her keyword as “Fiddle-Dee-Dee” in the smart collection, but I’d keyworded her products as “Fiddle Dee Dee” without the hyphens. Oops! Precision and accuracy are important when building these queries.
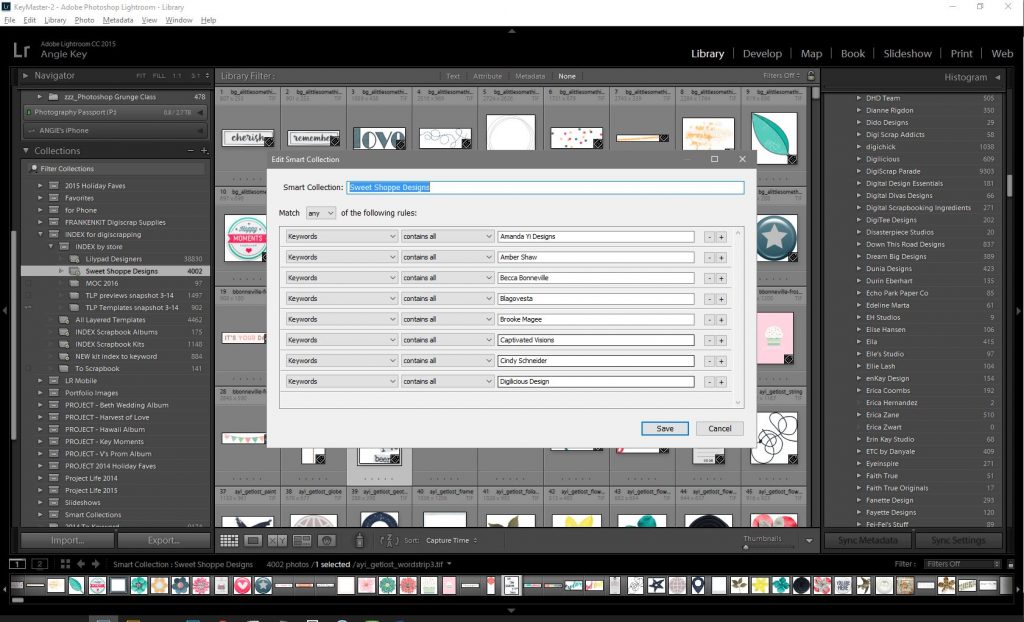
I’ve even got a Smart Collection for all the kit previews I still need to keyword.
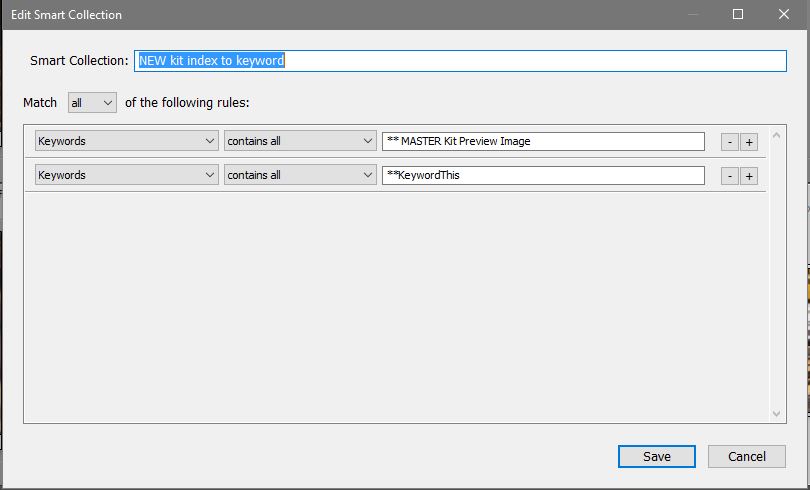
That way when I have 15 minutes to devote to keywording, I pull up the collection and work with the next preview in the list. When I’m done keywording, I simply remove the tag **KeywordThis, and it disappears from the smart collection.
Frankenkits
Back in February, Tiffany Tillman-Emmanuel and her Scrapaneers team sent out a series of newsletters on Speedy Scrapbooking. In the first installment, she talked about building Franken(stein)-Kits, “mixing and matching pieces from various sets to create one massive, all-purpose kit unique to your own tastes. It includes all of the most important junk you love and combines them together so the whole is better than the parts.”
It’s a brilliant idea, and my Lightroom supply catalog made it easy! I set up a Collection Set called FRANKENKIT Digiscrap Supplies, and added collections for everything from all-purpose fasteners to labels and tags to solid paper and white paper and my beloved keys. No need to move files outside their original kits, or create duplicate copies of supplies – instead, I just dragged-and-dropped the supplies into the collection. The original file never moves, but Lightroom keeps track of a pointer, like a shortcut, for me automatically.
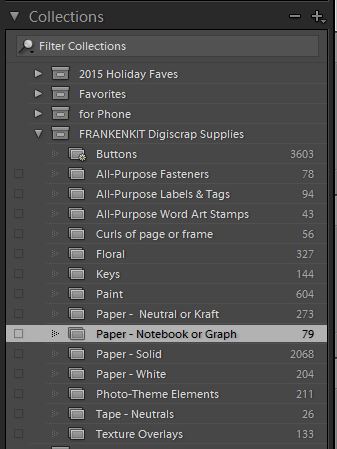
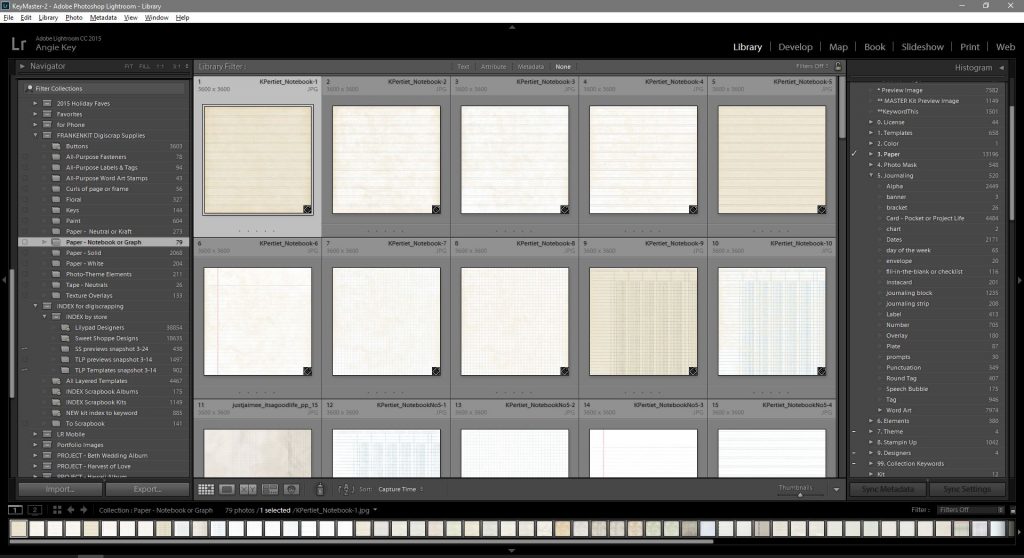
If I want a piece of notebook-patterned paper and I don’t care who the designer is, I just go to my Frankenkit collection of Paper – Notebook or Graph. Once I’ve found the piece I want, I either press CTRL+E to open it directly in Photoshop or right-click and choose Show in Explorer.
The Bottom Line
With keywords and Lightroom Smart Collections, I can quickly and easily change how I view, search, and access the supplies I own without having to do a massive reorganization or change of keywords. I can quickly find what I need for a particular project among the thousands of files I own, and with a small ongoing investment for upkeep and importing new supplies, I’m spending my time creating art rather than organizing.
And that makes me one very happy scrapbooker!

 Digiscrap Nirvana – My Workflow
 »
»
[…] organizing supplies, then walk you through how I add new stuff to my library, and finally show you how I find and use what I have. Here we […]